

How to Install a Privacy Screen: A Step-by-Step Guide

SONCO Safety Marketplace, August 29, 2024
Read more about the author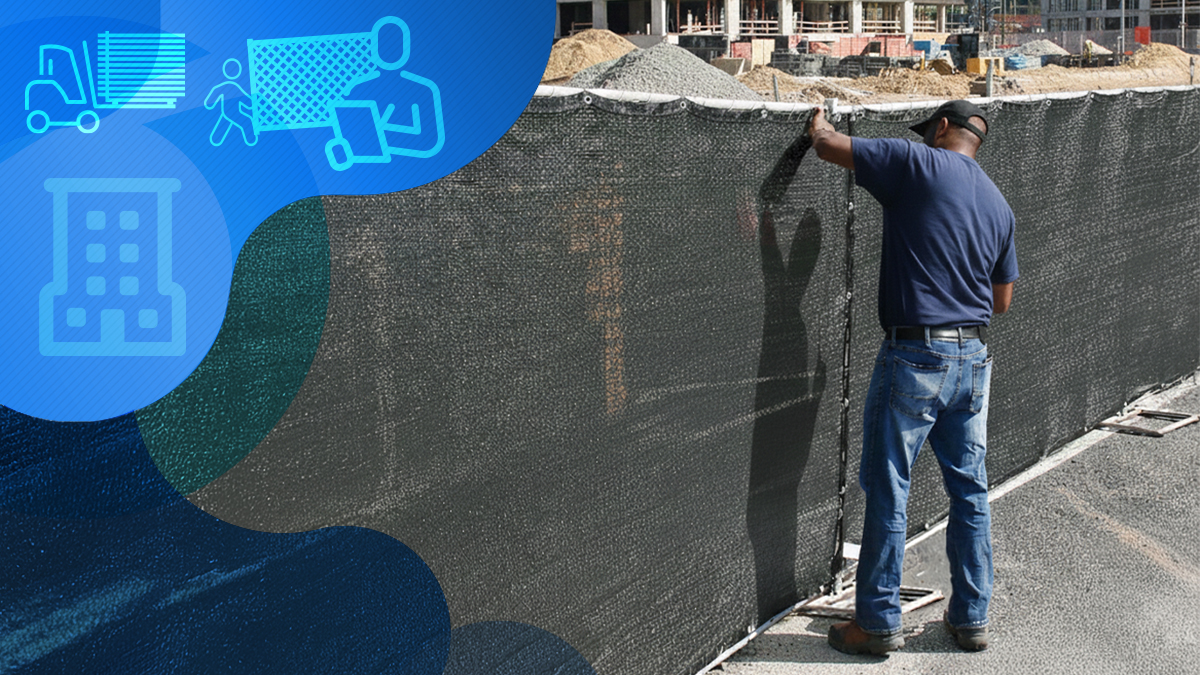
When a Privacy Screen is installed the right way, it stays tight, avoids wrinkles, and handles daily wear better, something that matters to contractors, crews, and rental companies that support multiple jobs at once.
This quick guide shows how to hang a Fence Privacy Screen the right way, using simple steps and the materials you already have on-site.

Step-by-Step Guide to Installing Your Privacy Fence Screen
1. Gather the Materials
A privacy fence screen is only as good as its installation. For the best results, plan ahead to avoid wrinkles, gaps, or damage.
Measure the fence, determine where you'll start and end, and make sure you have everything ready before you begin.
Key materials include:
- 50lb zip ties
- Hog ring pliers
- Ladder (if working on a tall fence)
Tip: Install on a calm day for best results. Avoid wind, which can complicate the process.
2. Do Your Prep Work
If you're installing the screen on a chain-link fence, align the mesh toward the top to keep everything even. This visual line helps ensure the screen remains straight.
Reminders:
- Never attach the screen to the fence’s top rail.
- Don’t over-tighten the zip ties, as this can cause ripples.
3. Line Up the Edges
Start by securing the top edge of your screen using the visual line from the previous step.
Attach the top left corner of the screen to the tension bar with a zip tie. Secure the second zip tie to the same grommet, forming an “L” shape.
Next steps:
- Attach additional zip ties to the corner grommets.
- Work your way across the top edge to keep the screen straight.
4. Secure the Left Side
Locking the left side sets the straight line that guides the rest of the installation.
Work down the tension bar to keep the screen aligned with your visual line.
Reminder:
- Keep the tension consistent as you attach each grommet so the fabric doesn’t drift.
5. Secure the Top
The top run controls the overall appearance and stability of the screen.
Follow the same mesh row you selected earlier to maintain a clean, straight line.
Tip:
- Angle each zip tie the same way to keep the tension uniform across long runs.
6. Secure the Bottom With a Second Person
Two workers make this part faster and prevent wrinkles from locking into place.
While the lead installer works across the top, the second installer follows to smooth and tie the bottom.
Important:
Smoothing the fabric before tying is what keeps long screens flat and professional-looking.
7. Finish the Panel
Closing the panel cleanly keeps the entire fence line tight and consistent.
Use the same two-tie corner method you applied at the start.
Reminder:
Check alignment before moving to the next panel to avoid correcting tension later.

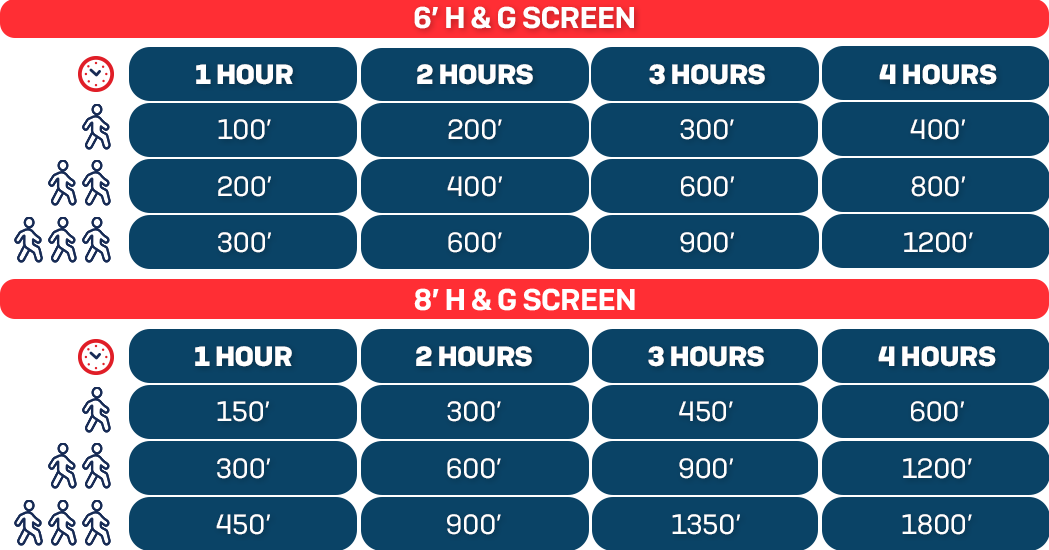
How Long Does It Take to Install a Privacy Screen?
Installation time may vary from one situation to another.
There’s the size of the fence to consider, the complexity of the screen you chose, and whether you’ll be installing the fence on your own or with another person’s help.
But on average, it takes anywhere between a few hours and a day to install a fence screen from start to finish.
Longer perimeters benefit from breaking the fence into smaller sections. This keeps the visual line consistent and reduces adjustments later.
Access around the fence, screen weight, and blockage level also influence timing, especially on jobs that require frequent stops or tight working space.
How to Choose the Best Privacy Screen
The best privacy screen will depend on the available options and the needs of the perimeter’s owner.
These are some key factors to consider when you're shopping.
Screen color
Privacy screens come in a variety of colors, including black, blue, orange, and shades of green.
Darker colors provide more privacy by reducing glare and helping those inside the perimeter see out without being visible from the outside.
Tip: Choose a color that balances your needs for privacy and visibility while complementing the jobsite’s overall aesthetic.
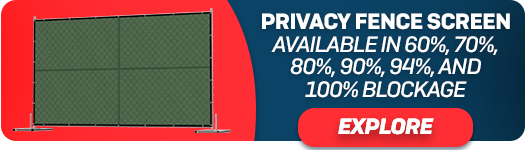
Blockage Levels: How Much Privacy Do You Need?
Privacy screens are available in various blockage levels, ranging from partial to complete coverage.
Higher blockage levels offer better privacy and wind protection, but too high of a blockage can increase tension and affect the screen’s stability.
Best Practice:
- For privacy and wind control: 80-85% blockage works well.
- For areas prone to high winds: Consider screens with built-in cut-outs to help relieve wind pressure.


Screen Style and Durability
Some privacy screens feature intricate patterns or designs, while others are simple and functional.
More intricate styles may require a higher blockage level to achieve the desired detail.
Consider how the screen will perform under long-term conditions (e.g., wind resistance and wear over time).
Tip: Simpler styles are often more durable, while detailed patterns may wear faster on construction sites.
Consider the Site Location and Environmental Factors
Screens installed in windy areas or high-traffic sites may need more durability or additional features to handle wear and tear.
Tip: If your jobsite is near an area with heavy foot traffic, or in a region with strong winds, choose a screen designed for these conditions (e.g., reinforced mesh).
Matching the Right Screen to Your Project's Needs
Choosing a privacy fence screen is about balancing privacy, protection, and performance.
Consider whether the screen will be temporary or long-term and what the overall project demands are.
Tip: For temporary fencing rentals, prioritize screens that are easy to install and remove, but still offer strong privacy and durability.

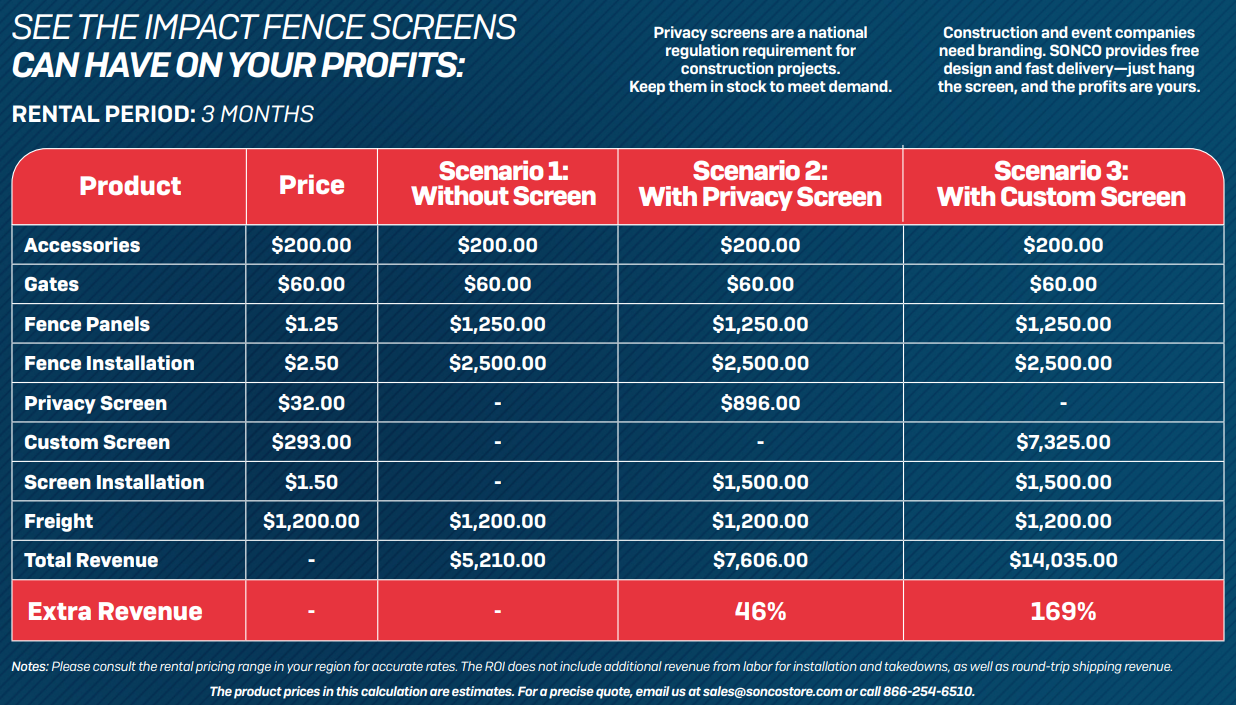
Making the Most Out of Temporary Fence Rentals
Upsell Privacy Screens to Boost Your Revenue
For rental business, offering privacy fence screens alongside your standard fence rentals creates a new revenue stream.
By providing custom privacy screens, you can charge for both the rental and the installation, significantly increasing your margins.
“Offering privacy screens turns a basic rental into a valuable upsell, increasing revenue significantly.”
— Andrew Hession, SONCO Rental Specialist
Example: How Rental Companies Can Maximize Profit
Adding privacy screens to your temporary fence rental offers a simple way to increase your revenue by up to 169% on each job.

Get Started with Your Custom Privacy Screen Today
Ready to enhance jobsites with a professional, consistent privacy fence screen?
Whether you’re a contractor, rental business, or project manager, we can help you choose the right screen for your needs and get it installed quickly.
Contact SONCO now for a quote or more information about our custom privacy screens, installation services, and how we can support your next project.
Request a quote or call 866-254-6510 to get started!

Trend now

Theme Park Safety: Avoiding Fines and Accidents with Crowd Control
Learn how crowd control products help keep theme parks safe, avoid accidents, and improve operations. Explore SONCO’s solutions for better crowd management.

Anti Scale Fence for Temporary High-Security Needs
Learn what an anti scale fence is, how it works and when to use one. Covers climb resistance, projectile protection, accessories and deployment best practices.

Why Bike Rack Barricades Are the Go-To Choice for Crowd Control
Explore why bike rack barricades are the go-to for crowd control. Learn how these versatile, durable barriers keep events, construction sites, and more organized.