

How to Set Up a Temporary Chain-Link Fence Panel

SONCO Safety Marketplace, May 15, 2026
Read more about the author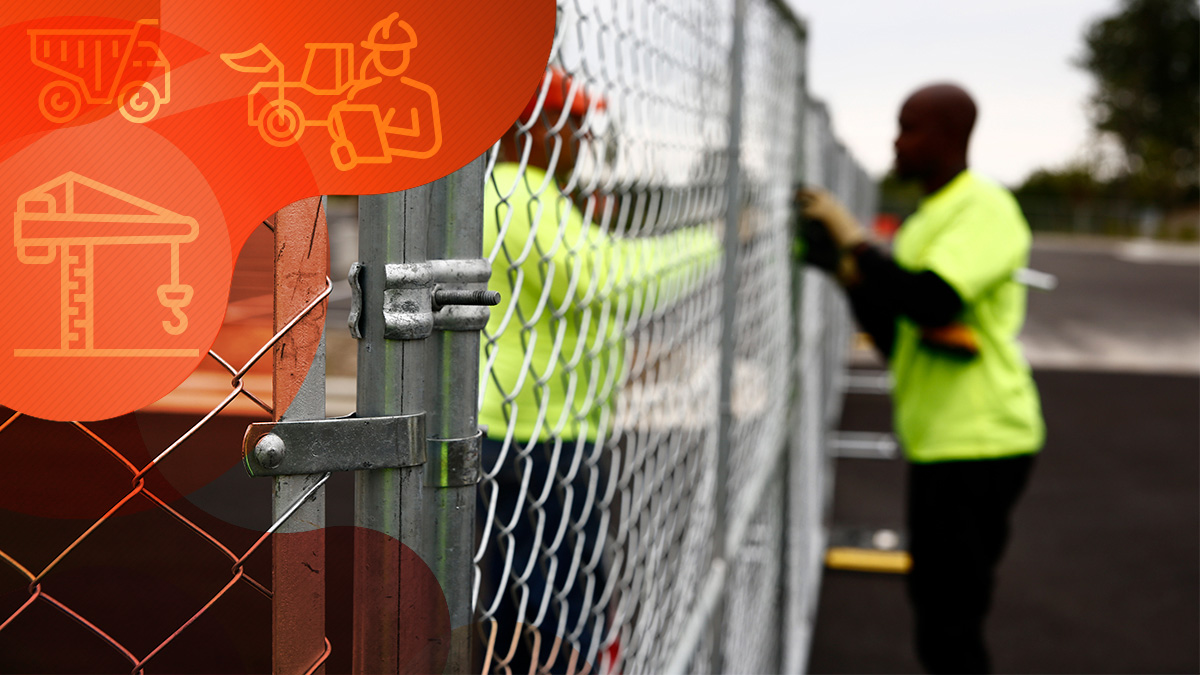
Whether you're securing a job site, enclosing a property, or adding temporary perimeter control, a panel chain link fence is one of the most reliable and cost-effective solutions available.
This guide covers everything you need to know (from initial planning through final inspection) to install your panel chain link fence correctly, safely, and in compliance with local regulations.
What Is a Panel Chain Link Fence?
A panel chain link fence consists of pre-fabricated mesh panels held upright by steel posts and connected to one another with coupler clamps. Unlike roll-type chain link fencing that requires stretching and tensioning, panel fencing arrives in rigid, ready-to-install sections, making setup significantly faster and more manageable.
Panel fences are popular for temporary applications, such as job site enclosures, crowd control, and event perimeters, but are equally effective as permanent or semi-permanent security solutions when properly anchored.
DIY vs. Professional Installation
One of the first decisions you'll face is whether to install the fence yourself or hire a professional crew. Both approaches have merit depending on your situation.
DIY installation
Handling the installation yourself can significantly reduce labor costs. Panel chain link fencing is designed with straightforward assembly in mind, and a small crew can often complete a moderate-sized perimeter in a single day. If you're comfortable with basic tools and have help on hand, DIY is a viable path.
Professional installation
For large-scale projects, complex terrain, or high-security applications, professional installation offers speed, expertise, and accountability. Experienced crews can handle challenges like uneven ground, obstacles, and tight tolerances more efficiently.
Important: Certain municipalities require professional installation for fencing that meets specific height, setback, or safety standards.
Some industries, including utilities, aviation, and federal contracting, are subject to additional federal regulations. Always check your local building codes and permitting requirements before beginning any fence project.
Planning and Site Assessment
Before ordering a single panel, thorough planning will save you time, money, and frustration down the line. The goal of your site assessment is to understand the space, identify hazards, and map out a practical fence layout.
Define the purpose of your fence
Are you securing a construction site, controlling access to an event, or providing long-term property security? The intended use determines how robust your installation needs to be. Including panel height, gauge, anchor type, and accessories like gates or privacy screens.
Map out your fence line
Walk the perimeter and mark where each panel and post will be placed. Note any corners, entry points, and areas where terrain changes. Mapping this out accurately ensures you order the right quantity of materials and helps you plan access points like gates before you begin.
Survey for obstacles
Scan the site for anything that could interfere with installation or compromise fence stability:
- Underground utilities (water, gas, electrical, telecoms). Always call 811 or your local dig-safe service before driving posts
- Overhead power lines that may pose a safety risk during installation
- Heavy debris, slopes, or soft ground that could affect post stability
- Existing structures, drainage features, or easements that affect fence placement
Choose your ground anchor method
Good, stable ground is essential for keeping a panel chain link fence upright, especially in wind or wet conditions. You have two primary options: driving posts directly into the ground using a post-hole digger, or using surface-mount anchor bases.
Anchor bases are widely recommended for temporary installations and sites where ground penetration is restricted, as they provide solid footing without permanent ground disturbance.
Pro TipAnchor bases are especially valuable in windy environments or on compacted surfaces like pavement. They provide adjustable, removable stability that keeps panels secure under adverse conditions.
Materials You'll Need
Gather all materials before you begin. Running short mid-installation slows progress and can leave your perimeter unsecured.
For a standard panel chain link fence installation you'll need:
- chain link fence panels,
- metal fence panel couplers (clamps),
- heavy-duty wire cutters, a power drill,
- heavy-duty wire,
- heavy work gloves,
- anchor bases or fence feet.
If you're going in-ground, add a post-hole digger. Depending on your project, you may also want access gates, privacy screens, and wheel kits for panel mobility.
When calculating panel quantity, measure the total perimeter, divide by the width of one panel, and order 5–10% extra to cover corners, gate sections, and any measurement discrepancies.
Step-by-Step Installation Guide
Step 1. Map your fence placement.
Using your site plan, mark the exact position of each post with stakes or spray paint. Confirm the layout before committing to anchor positions. Double-check measurements to ensure your panel count matches the perimeter, and account for any direction changes at corners.
Step 2. Position fence feet and anchor bases.
Set the anchor bases at each marked post location, spaced according to your panel width: typically every 10 feet, though this varies by panel size. Ensure each base is level and oriented so the post slots align with the direction of your fence run. On hard surfaces like pavement, secure the bases with ballast blocks or pins for added stability.
Step 3. Set the panels into the bases.
Starting at one end, insert the first panel's posts into the anchor base holes. Stand the panel upright and confirm it's plumb before proceeding. Work along the fence line panel by panel. Having a second person hold panels steady speeds this step considerably.
Step 4. Install metal fence couplers.
Once adjacent panels are in position, connect them using metal couplers. Slide the coupler over the joining posts of two neighboring panels and tighten with a drill until the connection is firm.
Repeat at every joint along the fence line. Properly tightened couplers give the finished fence its structural integrity — don't skip or under-tighten them.
Step 5. Install gates at access points.
At predetermined entry and exit points, install swing or rolling gates between dedicated gate posts anchored more heavily than standard posts.
Follow the manufacturer's instructions for hinge placement and latch alignment, and test the gate's swing and latching before moving on.
Step 6. Add privacy screens or accessories (optional).
If visibility into the secured area is a concern, install privacy screens or custom fence covers by threading or zip-tying them through the mesh. These also help reduce wind load in exposed locations. Wheel kits can be added to select bases to allow sections to be repositioned as project needs change.
Inspection, Wind Load, and Compliance
Once your fence is fully installed, a thorough inspection ensures it meets safety requirements and will perform reliably. Walk the entire perimeter and check that:
- Every panel coupler is tightened and secure with no loose connections
- All anchor bases are firmly in place and level
- No panels are leaning or showing signs of instability
- Gates open, close, and latch correctly
- Privacy screens are evenly attached with no loose sections
For sites in high-wind areas or exposed locations, it's worth reviewing wind load specifications for your fence system.
Manufacturers typically provide technical data on maximum wind ratings, recommended anchor spacing, and ballast requirements for different wind zones. Privacy screens and solid fence covers increase wind resistance significantly and may require additional anchoring.
Many manufacturers and distributors offer fence specification and inspection resources — including technical drawings, wind load charts, and installation checklists — that are worth referencing before signing off on a completed installation.
Professional Equipment for a Better Installation
Installing a panel chain link fence is a straightforward process when you have the right equipment and a clear plan in place.
From mapping out your perimeter and choosing the correct anchor bases to connecting panels with properly tightened couplers, every step builds toward a fence that is stable, secure, and built to last: whether for a single job site or a long-term property enclosure.
The difference between a fence that holds up under pressure and one that fails at the first sign of wind or wear almost always comes down to the quality of the materials used.
At SONCO, we supply professional-grade temporary fencing equipment trusted by contractors, site managers, and project teams across the country.
Ready to get started? Browse our full range of temporary fencing products or download the technical specifications to make sure your installation meets every safety and compliance requirement.
Frequently Asked Questions
Do I need a permit to install a chain link fence?
Permit requirements vary by municipality. Temporary construction site fencing typically falls under the overall building permit, while permanent residential fencing often requires a separate fence permit. Check with your local planning or building department before starting.
How long does installation take? A two-person team can typically install 200–300 linear feet in a full day. Smaller perimeters of 50–100 feet can often be completed in a few hours. Site conditions, obstacles, and accessories all affect total time.
Can panels be reused?
Yes — a key advantage of panel fencing over roll-type chain link is that panels can be disassembled, relocated, and reinstalled multiple times. This makes them ideal for temporary applications like construction sites, events, and seasonal enclosures.
What is the best way to anchor temporary panel fencing?
Anchor bases are the recommended solution. They sit on the ground surface without requiring dug holes, provide solid stability, and can be weighted with sandbags or ballast blocks for windy conditions. They're also easy to reposition and remove when the fence is no longer needed.
How do I add privacy to a chain link panel fence?
Privacy screens and custom fence covers attach directly to the chain link mesh using zip ties or woven fasteners. In addition to blocking sightlines, they reduce dust and debris transfer across the fence line — a practical benefit on active construction sites.
What gauge chain link should I use?
For most commercial and construction site applications, 11-gauge or 11.5-gauge mesh offers the right balance of strength and weight. Heavier gauges (lower numbers) suit high-security or long-term installations; lighter gauges are fine for short-term event fencing with lower security demands.
Trend now

Theme Park Safety: Avoiding Fines and Accidents with Crowd Control
Learn how crowd control products help keep theme parks safe, avoid accidents, and improve operations. Explore SONCO’s solutions for better crowd management.

Anti Scale Fence for Temporary High-Security Needs
Learn what an anti scale fence is, how it works and when to use one. Covers climb resistance, projectile protection, accessories and deployment best practices.

Why Bike Rack Barricades Are the Go-To Choice for Crowd Control
Explore why bike rack barricades are the go-to for crowd control. Learn how these versatile, durable barriers keep events, construction sites, and more organized.